
RV Roof Foam Insulation DIY Guide with Portable Spray Machines
- 2025-06-19
- View 4
DIY RV Roof Insulation: How to Use Portable Spray Machines for Professional Results
Owning an RV means enjoying adventures on the road, but it also comes with maintenance responsibilities - especially when it comes to roof insulation. Leaks and temperature fluctuations can turn your mobile haven into an uncomfortable space. That's where DIY spray foam insulation comes in. With the right portable equipment, you can create a seamless thermal barrier that prevents leaks, reduces energy costs, and maintains comfortable interior temperatures year-round.

Why Choose Spray Foam for Your RV Roof?
Spray foam insulation creates a continuous seal that traditional materials like fiberglass simply can't match. For RV roofs, this means:
Complete elimination of air gaps and thermal bridges
Significant reduction in condensation problems
Strengthened roof structure with added rigidity
Improved energy efficiency for AC and heating systems
Waterproof barrier that prevents leaks
The best part? With today's portable spray machines, what was once a professional-only job is now accessible to savvy RV owners who enjoy DIY projects. You'll save on labor costs while gaining complete control over the process.

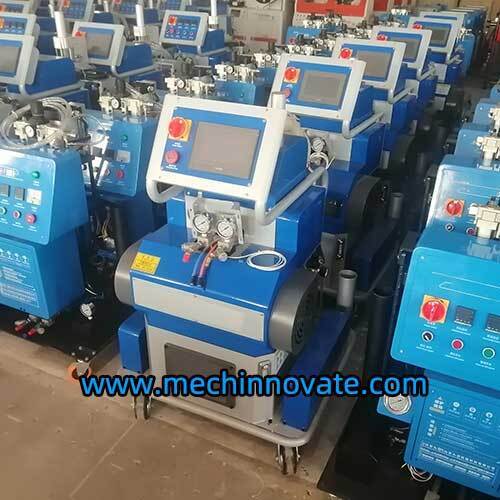
Choosing the Right Portable Equipment (Insert Picture Here: Image showing compact spray machine beside RV)
Not all spray equipment is created equal for DIY RV work. Look for machines with these key features:
Lightweight design - Should be easy to carry onto your RV roof
Precise temperature control - Essential for consistent foam expansion
Adjustable pressure settings - Different surfaces require different application pressures
Easy cleanup system - DIY-friendly models feature removable cartridges
Quick-connect nozzles - Allows for changing spray patterns during application
When selecting your setup, consider your RV's specific needs. Compact models work well for smaller campers, while units with longer hoses provide flexibility for larger motorhomes. Many owners find that exploring different application displays helps them understand how various configurations perform before purchasing.

Your Step-by-Step DIY Application Guide
1. Preparation is Everything
Thorough preparation prevents problems later:
Choose a dry day with temperatures between 60-80°F (15-27°C)
Clean the roof surface meticulously - remove all dirt, debris, and previous sealants
Repair any existing damage or soft spots in the roof substrate
Cover all vents, fans, and roof protrusions with protective plastic
Set up safety equipment including harness, goggles, and respirator
2. Mix and Test Your Materials (Insert Picture Here: Image showing foam testing on scrap material)
Spray foam consists of two components that must mix perfectly:
Select the right foam density - closed-cell foam works best for RV roofs
Calibrate your equipment according to the manufacturer's specifications
Test spray onto scrap material to check expansion rate and curing time
Adjust temperature controls to match ambient conditions
Calculate approximate material needs: most RV roofs require 3-5 gallons for 1" thickness
3. Application Techniques for Flawless Results
Master these professional methods:
Work in manageable 3'x3' sections for complete control
Maintain consistent distance - 12-18 inches from surface
Use smooth, overlapping passes with a steady sweeping motion
Pay special attention to roof edges and corners
Apply multiple thin layers rather than one thick coat to prevent sagging
4. Curing and Finishing Touches
The final steps ensure longevity:
Allow proper cure time - typically 24 hours before any foot traffic
Trim any uneven sections with a serrated knife
Apply UV-protective coating to prevent foam degradation
Reinstall roof accessories after complete curing
Perform a final water test to ensure complete waterproofing
Real-World DIY Success Story
Mark and Lisa, retired full-time RVers, noticed persistent roof leaks during rainy seasons. After quotes of $3,000+ for professional application, they decided to invest in a portable spray system instead. Their journey involved:
Choosing a mid-range portable machine specifically designed for RV work
Practicing on a discarded camper shell before tackling their own rig
Working methodically over three days for perfect results
Two years later, their roof remains completely watertight, and they've enjoyed over $1,800 in energy savings. As Mark put it, "The peace of mind knowing we sealed every possible entry point ourselves was worth the effort." For more real DIY triumphs, explore experiences from other RV owners.
Essential Safety Considerations
Safety should never be overlooked:
Always work with adequate ventilation - the process releases gases during curing
Wear a properly fitted organic vapor respirator rated for isocyanates
Use fall protection equipment when working on high RV roofs
Have an assistant available in case of emergencies
Keep all chemical materials in their original labeled containers
Never spray in confined spaces without proper ventilation
Maintenance Tips for Your Equipment
Proper maintenance ensures longevity for your investment:
Flush equipment immediately after each use using manufacturer-recommended solvents
Inspect hoses and fittings regularly for wear or blockage
Store components at room temperature away from direct sunlight
Use manufacturer-recommended replacement parts when needed
Regular maintenance ensures your equipment will be ready for future projects. When the time comes to replace parts or upgrade, working directly with a reputable specialized equipment creator provides peace of mind.
DIY vs Professional: Making the Right Choice
While DIY spray foam saves significant money, it's not always the best solution:
When to DIY:
You have a sound, easily accessible RV roof
You enjoy hands-on projects and have the necessary time
Budget concerns make professional quotes impractical
When to Hire a Pro:
Significant structural damage requires roof repair first
Complex roof designs with multiple penetrations and curves
Medical conditions could be aggravated by chemical exposure
Lack of safe working environment (height concerns, weather)
Maintaining Your Newly Insulated Roof
Extend the life of your insulation with these practices:
Clean your RV roof twice annually using non-abrasive RV cleaners
Inspect after extreme weather for any damage or lifted edges
Touch up any cuts or abrasions immediately to prevent water intrusion
Reapply UV protective coating every 2-3 years
Ensure roof drainage points remain clear and unobstructed
The Satisfaction Factor
Beyond financial savings, DIY RV roof insulation delivers a unique sense of accomplishment. When you cruise down the highway knowing you personally created that protective barrier against the elements, every adventure feels more rewarding. Your RV isn't just a vehicle - it's your home away from home, and you've secured it against whatever the road brings.


