
Shipping Container Wall Foam Sprayer Machine Cost & Installation Guide
- 2025-06-20
- View 3
The Real Costs of Spray Foaming Your Container Home Walls - And How to Get It Right
Picture this: you've just received your shipping container, dreaming of turning it into a cozy home. But then you touch the metal walls on a cold morning - and reality hits. Without proper insulation, your container home will feel like living in an oven or freezer depending on the season.
That's where spray foam insulation comes in. As a container home owner who's been through the process, I'll share what I wish someone had told me before I started. You'll discover the true costs, equipment options, and insider tricks to avoid the common mistakes that cost people thousands.

(Image suggestion: Someone in protective gear spraying foam onto a shipping container wall)
Why Spray Foam is Container Home Gold
Let's get real - traditional insulation struggles with container homes. Fiberglass bats sag in vertical spaces. Rigid boards leave gaps. But spray foam:
Forms an airtight seal that stops drafts completely
Expands to fill every nook and cranny
Adds structural rigidity to thin container walls
Blocks moisture that causes rust
R-values outperform traditional materials
When done right, you get a comfortable, energy-efficient space that saves you money year after year.
The Equipment Price Range - From Affordable to Professional
Here's the breakdown I wish I had when planning my budget:
Rental Units ($300-$500/week)
Pros:
No large upfront investment
Professional-grade equipment
Ideal for one-time projects
Cons:
Rental fees add up quickly
Limited time to complete your project
Some require experience to operate
DIY-Friendly Kits ($1,000-$2,500)
These all-in-one packages changed the game for container home owners. They include:
Small spray gun and compressor
Disposable tanks of foam chemicals
Safety gear included
Simple "point and spray" operation
Perfect for walls under 800 sq ft. The smaller spray systems have become popular for DIY container conversions.
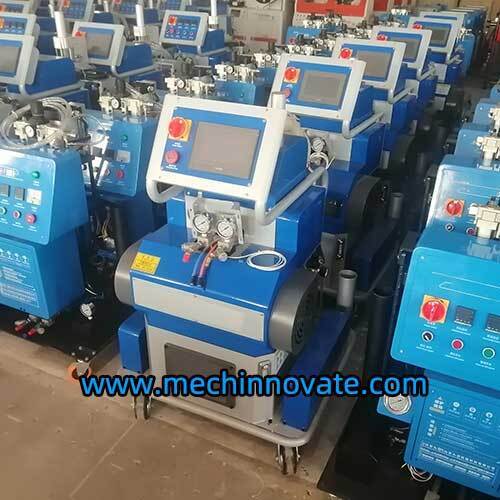
Professional Spray Rigs ($5,000-$25,000)
You'll see these if you:
Have multiple containers
Plan commercial projects
Want to start an insulation business
Features include:
Continuous spray capability
Adjustable pressure and temperature
Large chemical tanks
Built-in heaters for cold weather
If you're considering multiple projects, browsing industrial spraying solutions could save money long-term.
(Image suggestion: Three types of spray foam equipment side by side)
The Installation Process Demystified
Let me walk you through the actual steps, based on my own container insulation journey:
Prep Work That Makes All the Difference
Spray days are exciting - but prep is 80% of the battle:
Clean like your insulation depends on it (because it does): Degrease every surface to remove shipping residues. Rusty spots? Sand to bare metal and apply converter.
Frame smart: Install your wall studs, leaving 1-2" clearance from container walls for foam expansion.
Cover what shouldn't be foamed: Mask windows, doors, and any surfaces you plan to leave exposed with heavy plastic and painter's tape.
Create ventilation: Use exhaust fans at both ends of the container.
Temp matters: Spray only when temperatures are between 60-85°F.
Spray Techniques for Perfect Results
Here's how to get professional-looking foam without the pro price tag:
Start in corners where mistakes are less visible
Spray in foot-wide sections moving horizontally
Keep consistent distance - 12-18 inches from the surface
Overlap each pass by 50% to prevent gaps
Watch expansion - stop periodically to see how thick it's getting
Finish with a smooth pass for an even surface

The Waiting Game and Final Steps
After spraying:
Let foam cure for 24-48 hours - this varies by product
Trim overspray and uneven spots with a serrated knife
Conduct moisture tests - unexpected wet spots signal problems
Install vapor barriers according to local codes
Material Costs - How Much Foam You Really Need
Here's a realistic cost calculator based on container sizes:
Container Size
Area to Insulate (sq ft)
1-inch Foam Coverage
Estimated Cost
20ft Standard | 320 | 8-10 kits | $1,100-$1,500 |
40ft Standard | 580 | 14-16 kits | $1,900-$2,300 |
40ft High Cube | 620 | 16-18 kits | $2,200-$2,600 |
Note: Prices for closed-cell foam kits at 1" depth
For large projects, consider specialized foam formulations that might save costs.
Safety First - Non-Negotiables
After helping several friends with their projects, I won't compromise on:
Respirator mask: Full-face with organic vapor cartridges
Coveralls: Disposable Tyvek suits with hood
Goggles: Seal around eyes
Gloves: Chemical-resistant nitrile
Ventilation: Active exhaust with fresh air intake
This isn't regular spray paint - foam chemicals require respect.
Calculating Your Total Investment
Beyond equipment and foam, remember to budget for:
Prep materials (cleaners, sandpaper)
Protective gear ($150-$300)
Waste disposal fees
Finishing materials (vapor barrier, trim)
10-15% extra foam for learning curve
My average cost breakdown for my 40ft container was:
Foam kits: $2,100
Rental equipment: $450
Safety gear: $220
Prep materials: $120
Total: $2,890
Compared to $5,800+ quotes from pros - not bad!

When DIY Makes Sense - And When to Call Pros
After helping with dozens of container projects, here's my advice:
Go DIY if:
You have a single container
You're comfortable with similar projects
You have adequate prep time
Local rental equipment is available
Call professionals when:
Insulating multiple containers
You need insulation in hard ceilings
Complex designs with many cutouts
Local regulations require certified installers
Many homeowners split the difference: DIY walls, hire pros for complex areas. If hiring, understanding spray system requirements helps evaluate contractors.
The Sweet Rewards of DIY Foam Insulation
Standing in my finished container home during its first snowstorm, feeling the warmth radiating from properly insulated walls? Priceless. But the measurable benefits are impressive too:
60-70% heating/cooling cost reduction
Condensation and rust prevention
Significant noise reduction
Increased resale value
My energy bills are less than my neighbor's traditional home half the size. And that metallic echo? Gone - replaced with cozy quiet.
For those considering container living, spray application examples can inspire your approach.
Your Container Insulation Journey Starts Now
Spray foam transforms shipping containers from industrial boxes into dream homes. The process may seem intimidating at first, but breaking it down makes it manageable:
Assess your project scope realistically
Choose the right equipment approach
Prep like a perfectionist
Spray with care and patience
Enjoy living in your efficient, comfortable space
Your future self will thank you every month when that utility bill arrives. Ready to start planning? Check spray system options available for different project scales.


